
1
/
of
3
My Store
Self Adhesive Clear Gloss Laminating Film, perfect for stickers and artwork. Oversized A4 small run orders welcome - Cold Lamination Film
Self Adhesive Clear Gloss Laminating Film, perfect for stickers and artwork. Oversized A4 small run orders welcome - Cold Lamination Film
Regular price
£3.00 GBP
Regular price
Sale price
£3.00 GBP
Unit price
/
per
Taxes included.
Shipping calculated at checkout.
Couldn't load pickup availability
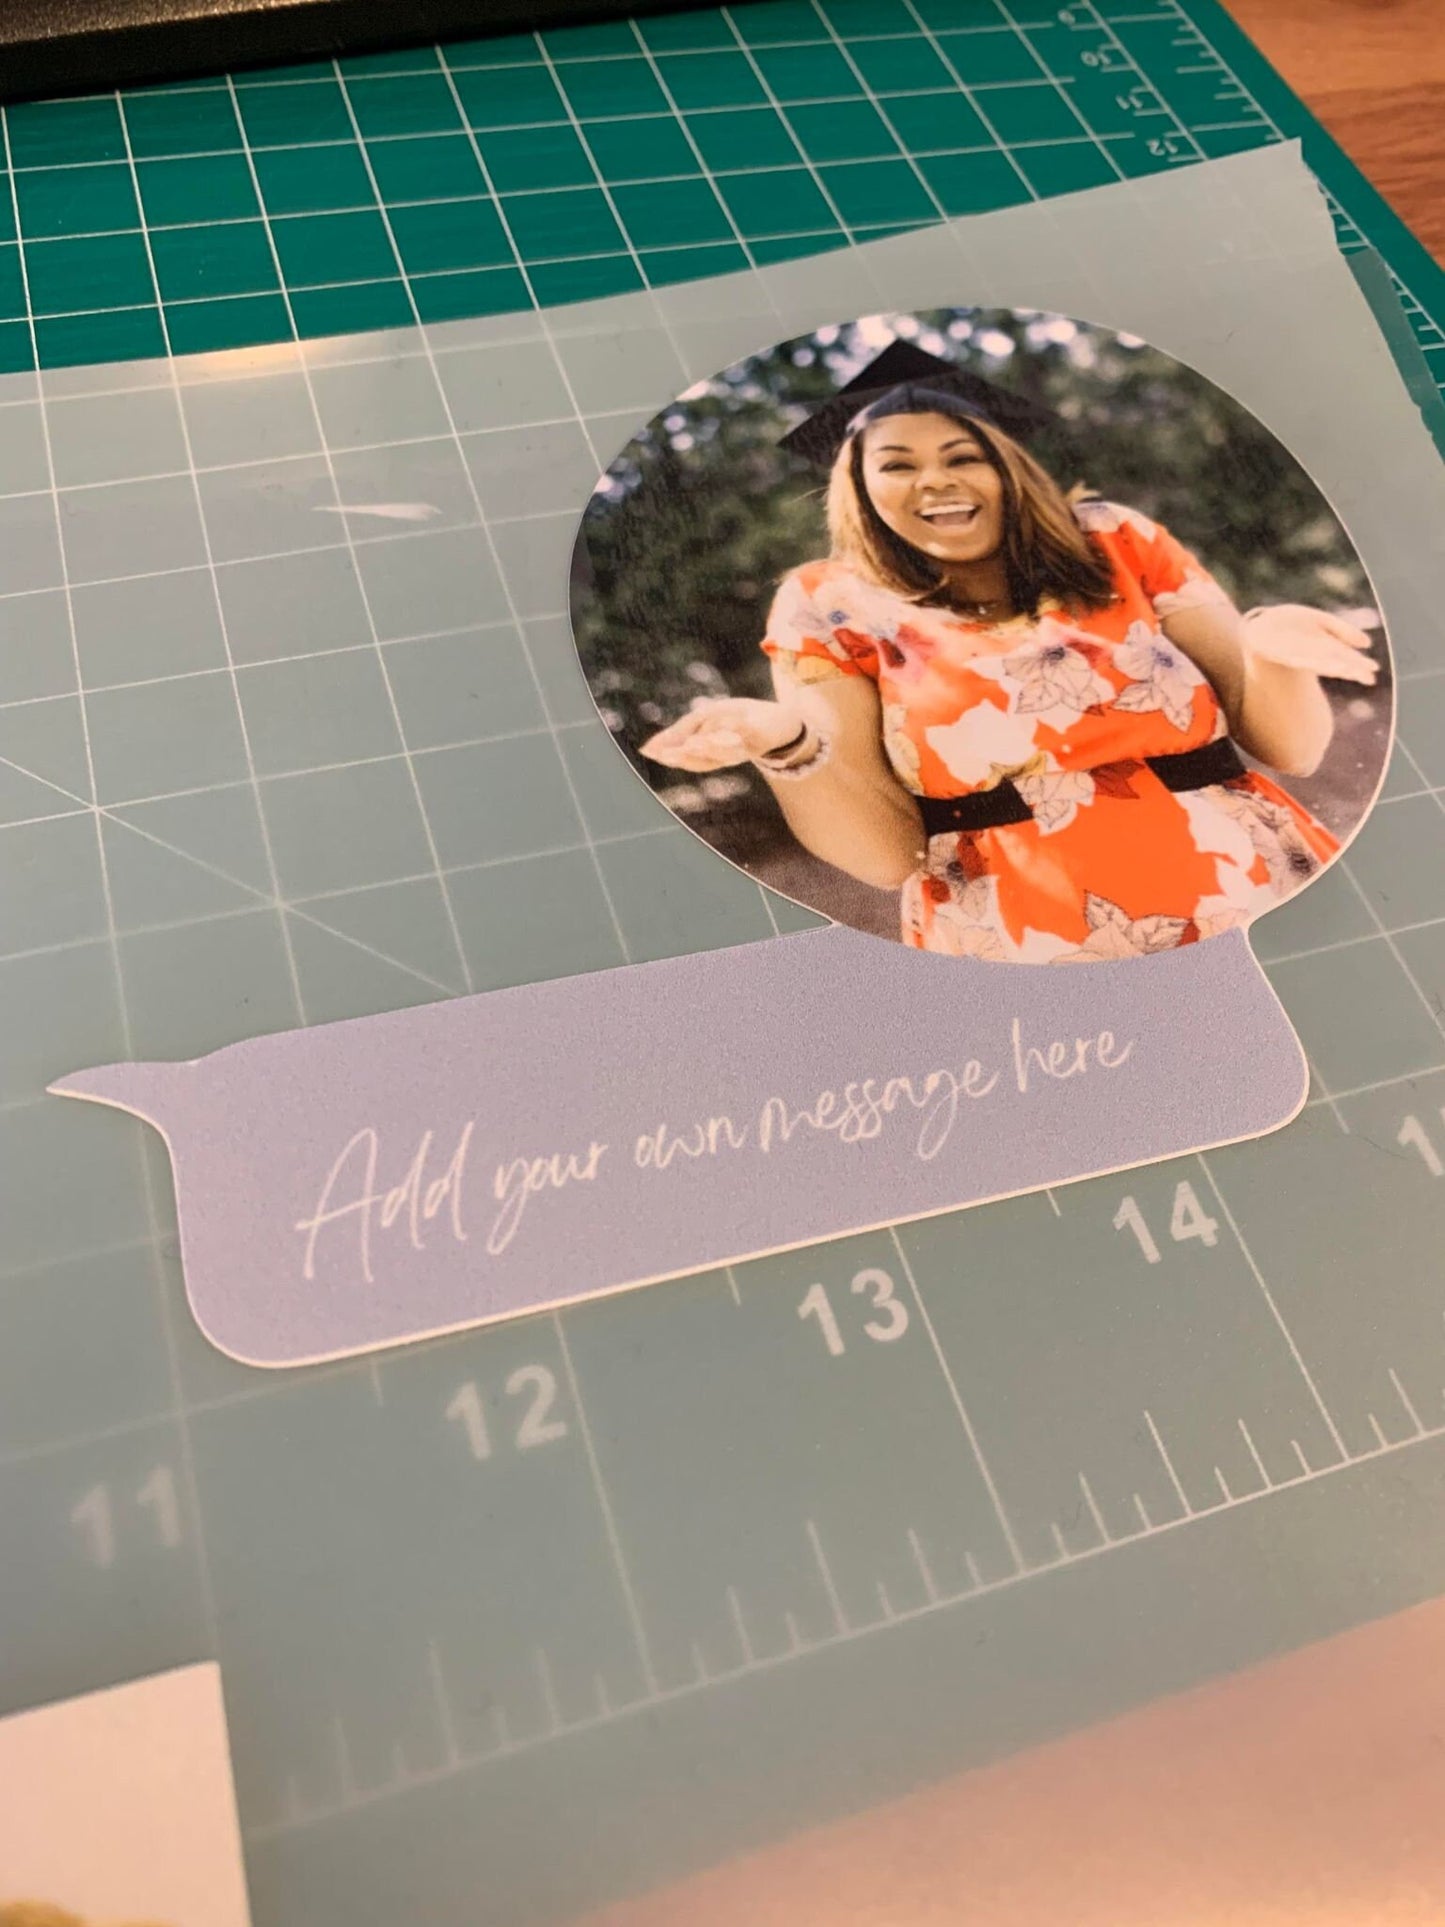
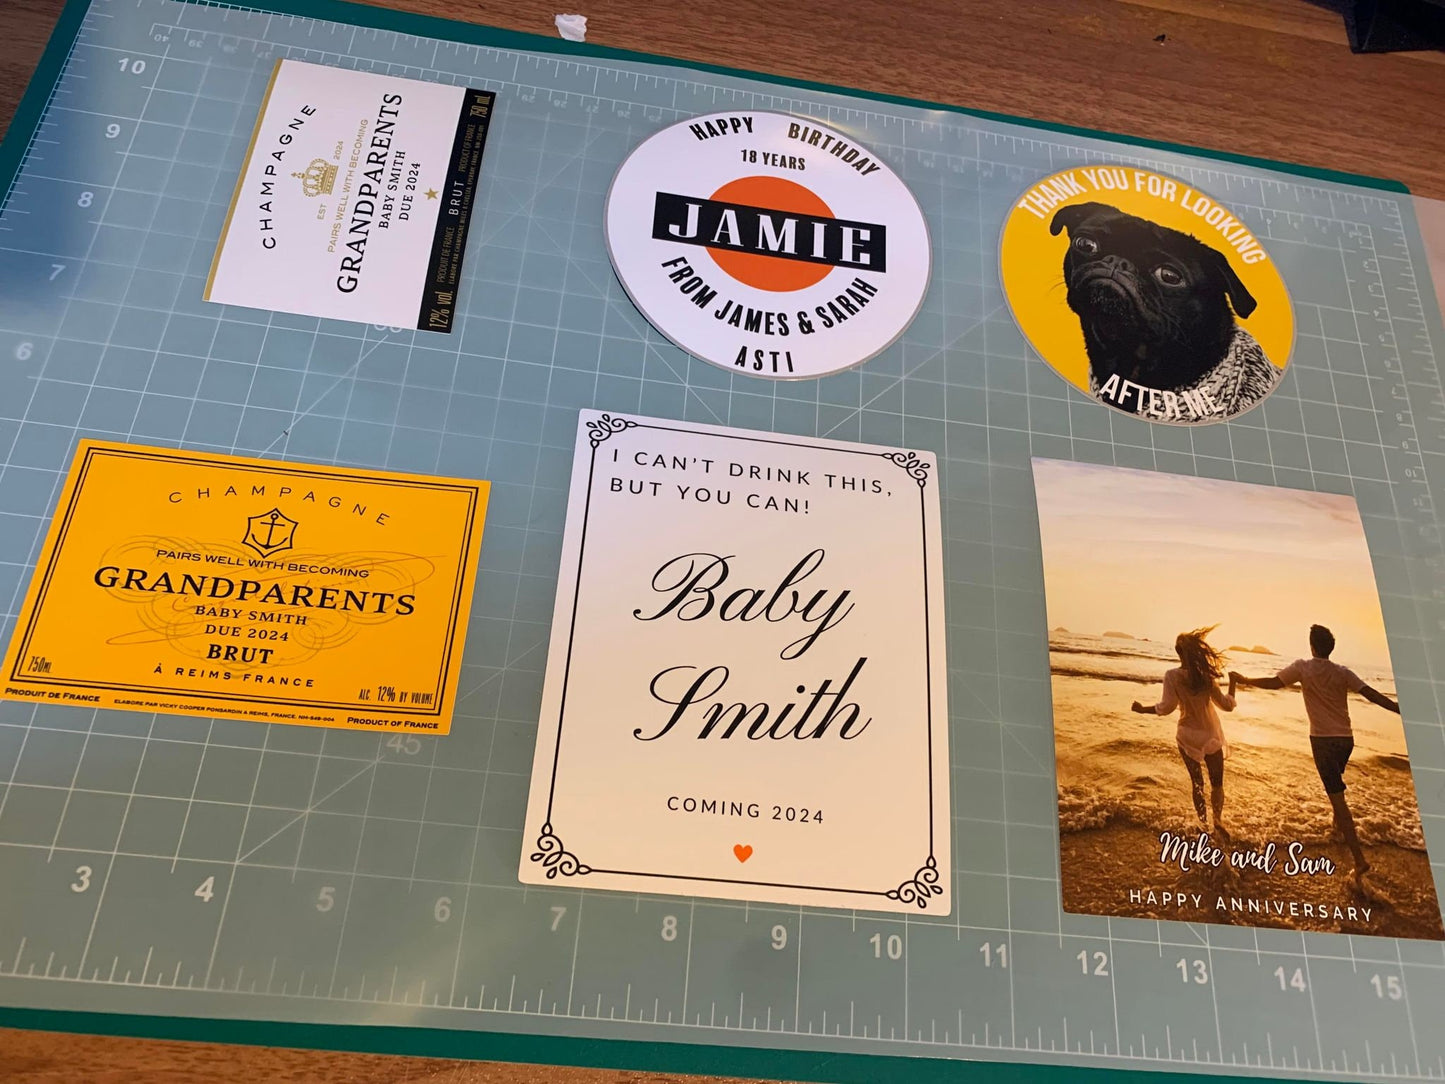
Self Adhesive clear Gloss Laminating Film. A Professional grade high-quality solution perfect for preserving and protecting your stickers and prints.
- Textured Matte Finish with Minimal Reflection.
- 70 Micron/2.7 Mil Thickness
- Sheet Size Approx: H 12" x W 9"
- Clear Film with permanent acrylic adhesive on a peel away Backing Sheet.
- Designed for easy application by hand, cold laminator or roller.
- Protection from Minor Scratches, Water Resistance and soft to touch.
- Suitable for indoor and Outdoor use with UV Protection.
Instructions:
Prepare Your Workspace:
Choose a clean and flat surface to work on, preferably a table or desk.
Make sure the area is well-lit for better visibility.
Ensure your stickers are clean and free of any dust or debris.
Cut the Laminate Sheet:
Measure and cut the cold laminate sheet slightly larger than your sticker. You want to have some extra laminate around the edges to ensure complete coverage.
Peel Off the Backing:
Peel off the backing of the cold laminate sheet to expose the adhesive side.
Place the Sticker:
Carefully place your sticker onto the adhesive side of the laminate sheet. Position it evenly, leaving some space around the edges.
Smooth Out Air Bubbles:
Use a clean cloth or a roller to smooth out any air bubbles or wrinkles between the sticker and the laminate sheet. Start from the center and work your way outwards to the edges.
Trim Excess Laminate:
Once the sticker is securely attached to the laminate sheet, trim off the excess laminate around the edges. You can use scissors or a paper trimmer for this step. Be sure to leave a small margin of laminate around the sticker to seal the edges.
Optional: Round the Corners (if desired):
If you prefer rounded corners on your stickers, you can use scissors or a corner rounder punch to trim the corners of the laminate sheet.
Final Inspection:
Carefully inspect the laminated sticker for any remaining air bubbles or imperfections. Smooth out any wrinkles or bubbles as needed.
Repeat for Additional Stickers:
If you have more stickers to laminate, repeat the process for each one.
Allow to Set:
Allow the laminated stickers to set and dry completely before handling or using them.
Enjoy Your Protected Stickers:
Your stickers are now protected with a durable laminate coating and ready to be used or displayed!
By following these steps, you should be able to successfully apply cold laminate sheets to your stickers, providing them with added protection and longevity.
Share